
Day 33: Important Reminders
Now that you’ve mostly finished setting up your site, let’s make these changes in your hosting account.
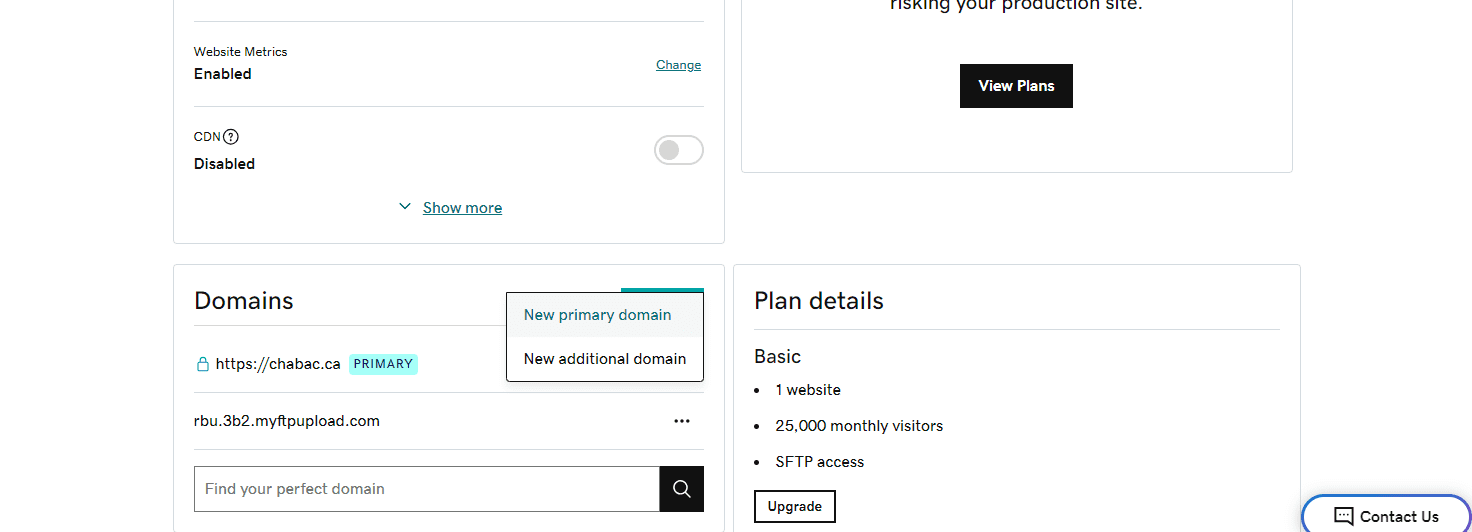
Change Your Domain
Change your domain to the one you purchased.
Go to “Settings,” scroll down to Domains, and when you click on the button “Add,” you can switch the temporary domain to the one you just purchased.
IMPORTANT: There are more instructions below about connecting or transferring an existing domain to connect it with your new WordPress site.
Enable CDN
Don’t forget to enable the CDN for faster loading times for your visitors. Above Domains, just toggle the CDN option on.
If you want to make these changes later, that’s fine, but just be sure not to forget!
Delete Unnecessary Plugins
As you’ll read in the lessons on updating and troubleshooting, the #1 issue with WordPress websites is incompatibility between different plugins or plugins and the theme. Another issue is having way too many plugins, which leave your site vulnerable and slow it down.
So delete any plugins you don’t need, like the following.
- Starter Templates – Once you’ve installed your template, there’s no need for this plugin anymore.
- Akismet Anti-Spam – It may have come with your site, but if you’re not paying for and using it, don’t keep it. You can use the anti-spam plugin I mentioned in the lesson on the contact form.
- Limit Logins – Your hosting plan comes with premium security features, so you don’t need this plugin.
- WooCommerce or Surecart – If you don’t have a store and you won’t be building it soon, delete all e-commerce plugins. You can add them later if you need them.
If you’re not sure if a plugin is needed, you can read the description on the Plugins page to understand its function and determine if it’s actually in use on your site.
Also, you can deactivate it temporarily and check all your pages and posts to see if anything has changed or disappeared. If nothing is different, it’s likely not in use and you can delete it.
You can always readd it, and once you do, all your old settings and data will come with the reactivation (as long as you didn’t choose to delete data upon deleting the plugin).
Optional: Transfer Your Domain to Dynamite Web Services
If you want to keep everything under one roof, meaning have your domain and possibly email account with your hosting all in your Dynamite Web Services account, there are two sets of instructions you need to follow: one from Wix, GoDaddy, Square, or you have your domain and the other from Dynamite Web Services.
Here are the instructions from major companies that you can buy domains from.
If your company is not here, especially if they’re smaller, you can either search for their domain transfer instructions on Google or give them a call to find out.
Here are the instructions from Dynamite Web Services
After you finish unlocking your domain and getting the authorization code, you then need to follow these instructions to add it to your account.
Once your domain transfer is complete, you can go to your hosting account and then Settings > Domains > Add > New Primary Domain, and choose the one you added to your account.
Connecting Your Domain Registered Elsewhere to Your New WordPress Site
If you don’t want to transfer the domain, you can still connect it to your new website in your Dynamite Web Services account. You just have to follow these instructions.
- Change Your Domain (Pay specific attention to the information in the second yellow Required box.)
However, connecting your domain located elsewhere means you have to learn to edit DNS records (instructions for a domain), which can be a little tricky but still possible for beginners to learn. Here’s a quick intro if you want to learn more.
If you need any help, you can call the customer service numbers for your current domain provider or Dynamite Web Services at the top of the home page. Or you can ask me.