Day 13: Customizing the Header
Customizing the header and footer are fairly similar processes.
Go to Header Builder, and you’ll see Site Title & Logo, where you can change the name of your website and add a logo for branding. You don’t need to go to Primary Menu because we already configured that.
The Transparent Header is where you can add a background picture that the logo and menu sit on top of, like in the second image below.
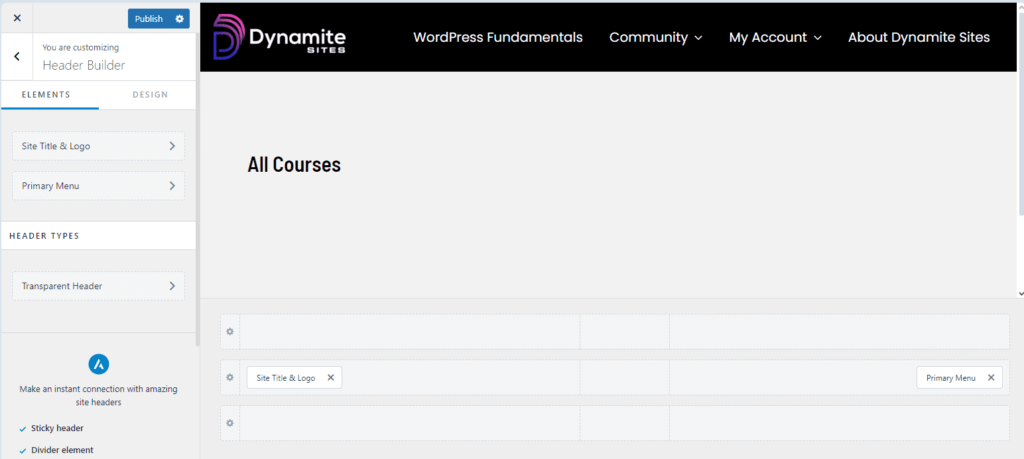
There can be 3 headers on your website. As you can see in my example, I just have one.
- An Above Header, where you typically put social media icons with links to your profiles or contact info. You can also put notifications for a sale or a temporary change to your service hours.
- Primary Header, where you put your logo, the navigation and your primary CTA, like a “Shop” button.
- Below Header, where you put a secondary menu or the search bar
Hover over the section of each header, and you’ll see a “+” sign appear. Click on it to add a widget, a section with content or functions.
If you click on the gear icon next to each header, you can change the background color, borders, and the padding (space around the element) or margins (space between elements) to style it further.
Transparent Header
When you click on Transparent Header, you’ll have to toggle “Enable on Complete Website” on before you can customize it. Choose what pages you want the transparent header to be on.
Go to Transparent Header > Design, and you’ll notice there is a second set of settings for menu colors, button colors, and so on because you’ll likely have to change your colors to the opposite ones so they’re still readable against the picture.
Changing the settings for the transparent header will not affect the pages with the normal header.