
Adding An Events Page & Registration
IMPORTANT: Make sure to check in the WordPress Dashboard > Settings and tick the box “Anyone can register,” so that eventgoers can sign up on your events, as WordPress users.
Install The Events Calendar’s Two Plugins
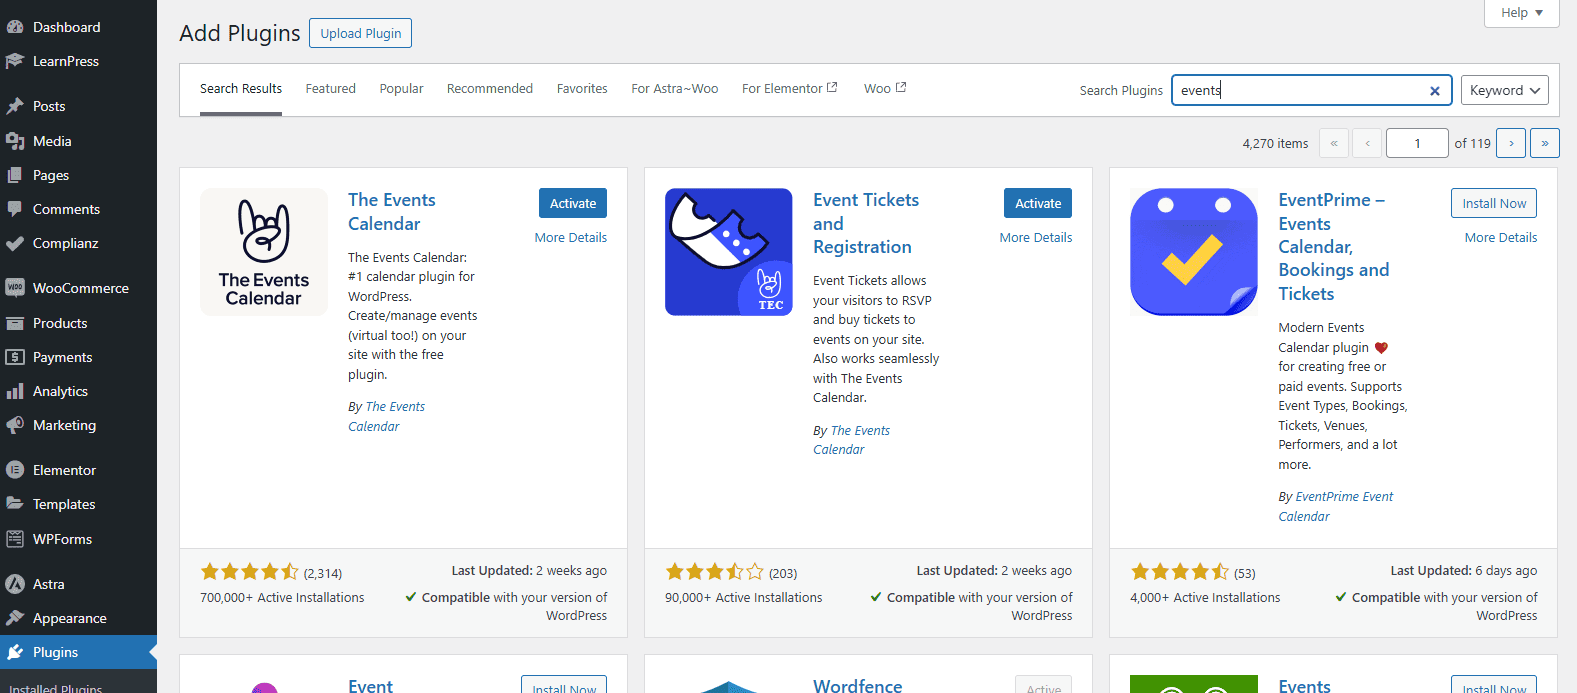
Go to Plugins > Add New Plugin and type in “events” in the search.
Install and activate The Events Calendar and Event Tickets and Registration.
First Time Setup
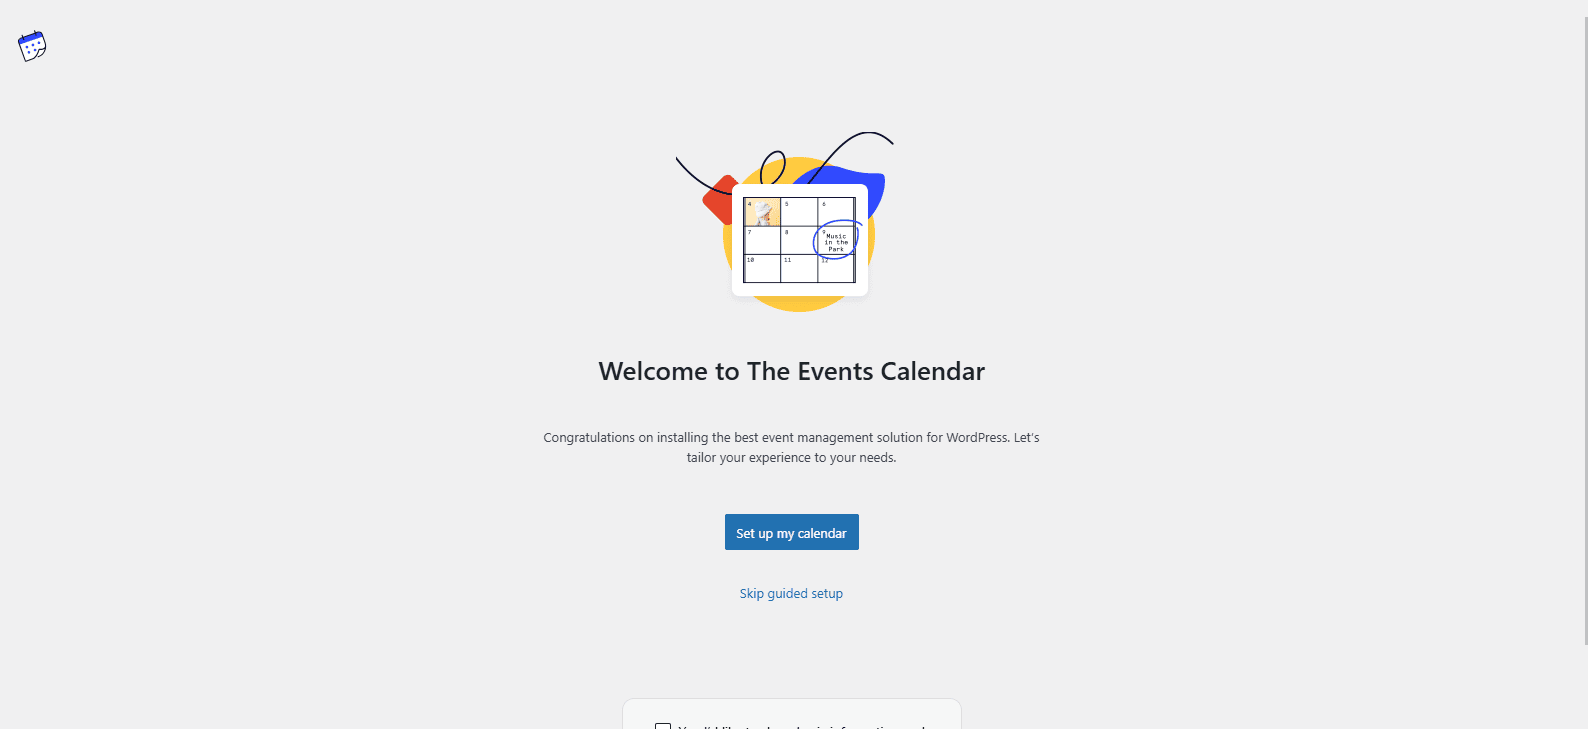
After you install and activate both plugins, in the backend go to Events > First Time Setup to get to the startup wizard below.
You can always go back to the setup anytime as well.
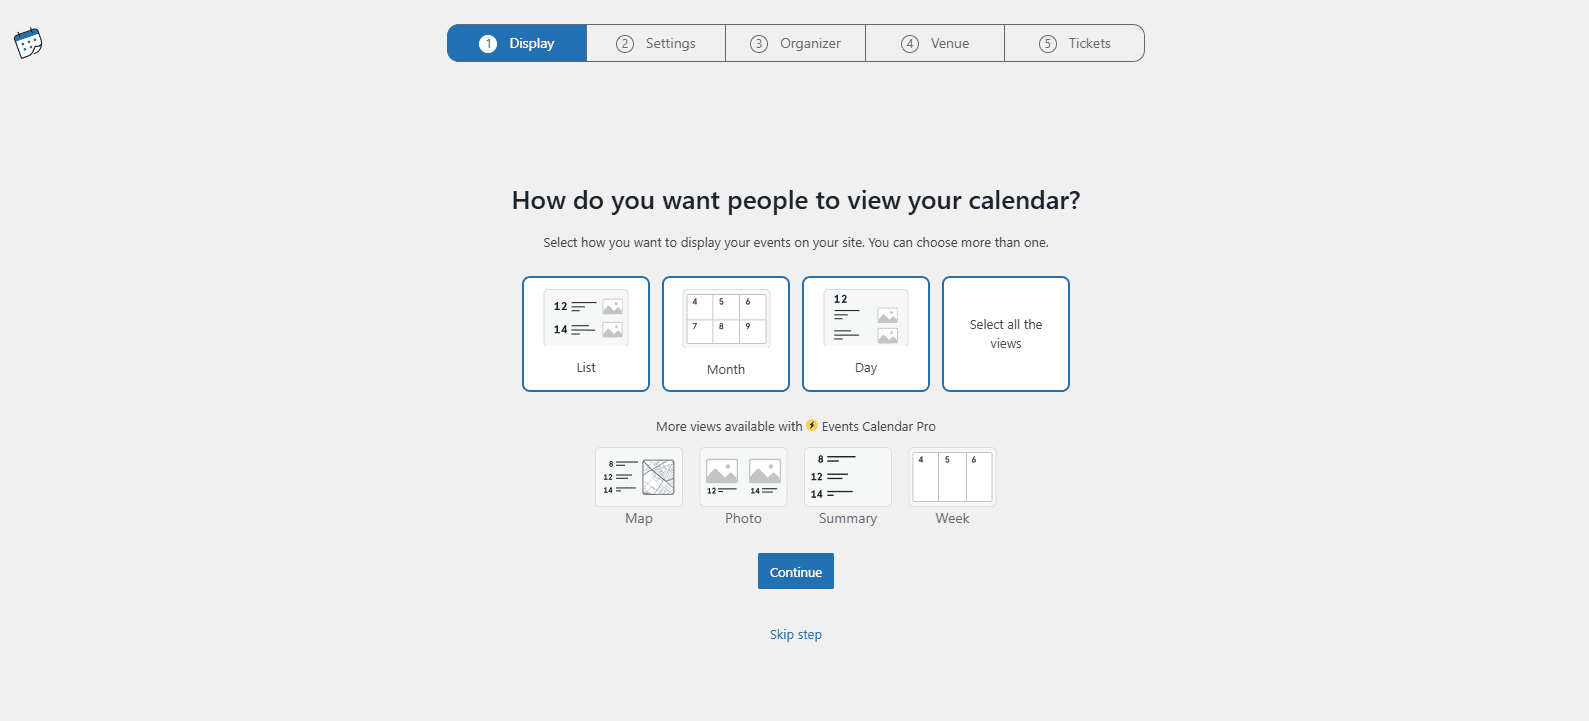
Display
Here, you have to decide the calendar view you want to use, but it’s best not to limit your users, and choose the last option, Select all the views, so they can decide.
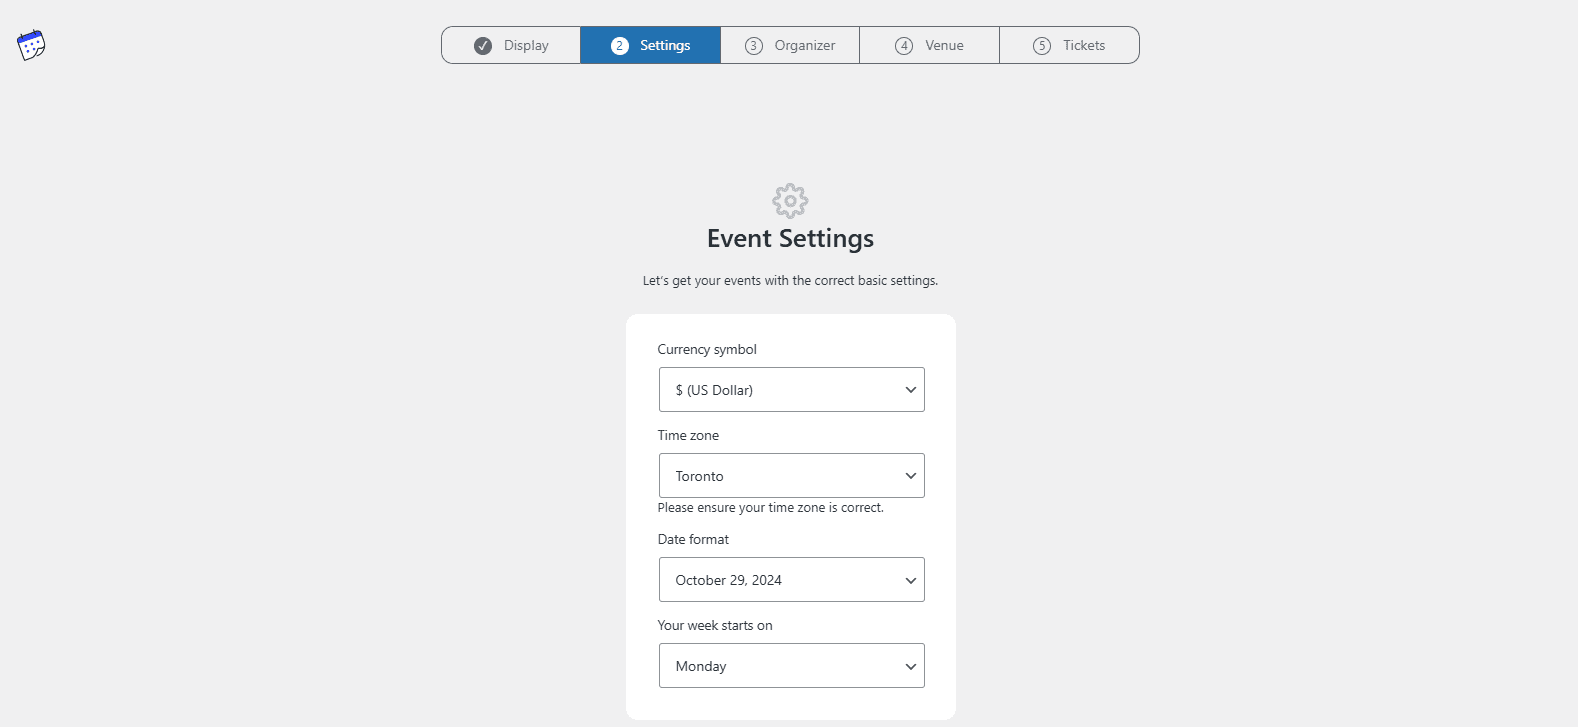
Settings
Choose your preferred currency, time zone, time and date format, etc.
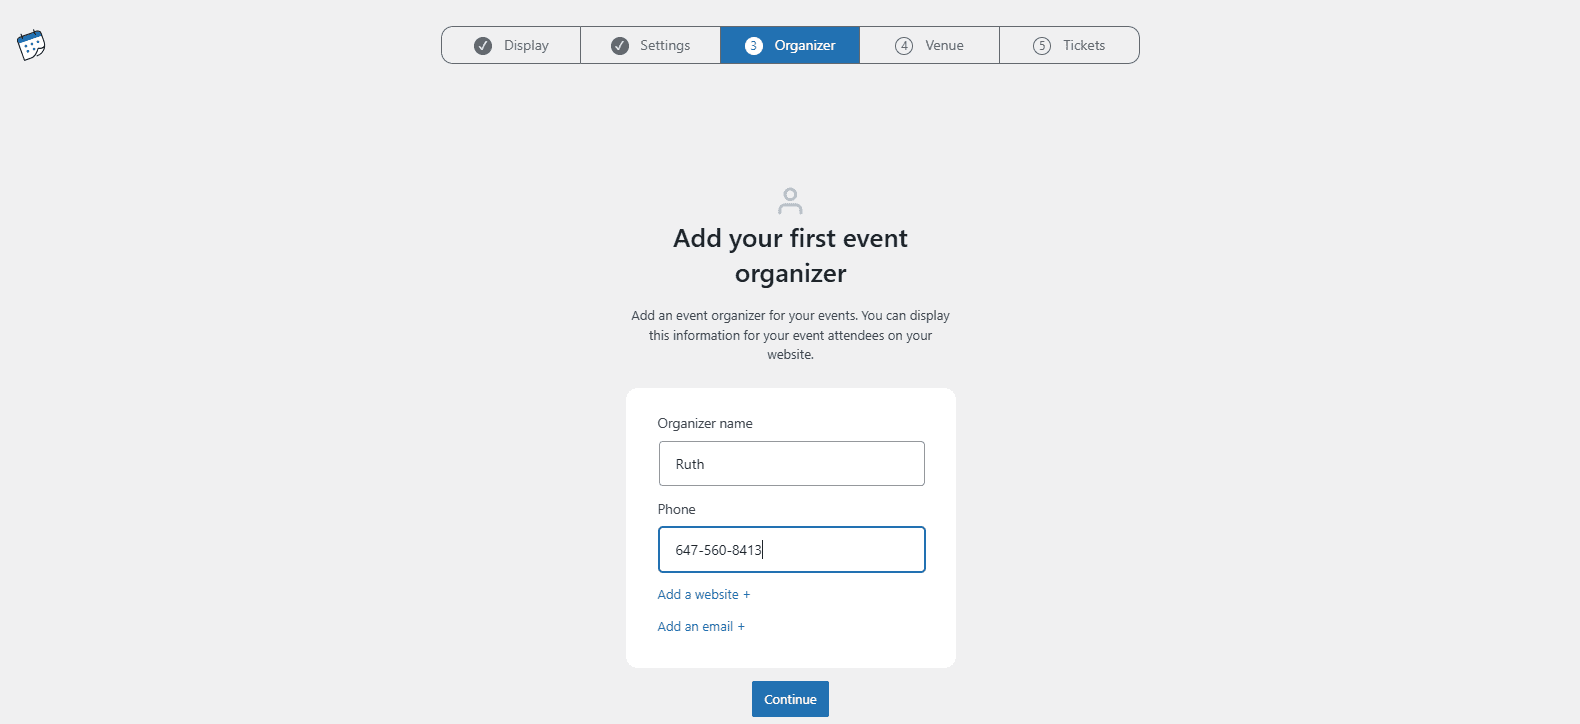
Organizer
For the sake of getting up an event as fast as possible, add an organizer even if it’s a fake or temporary one.
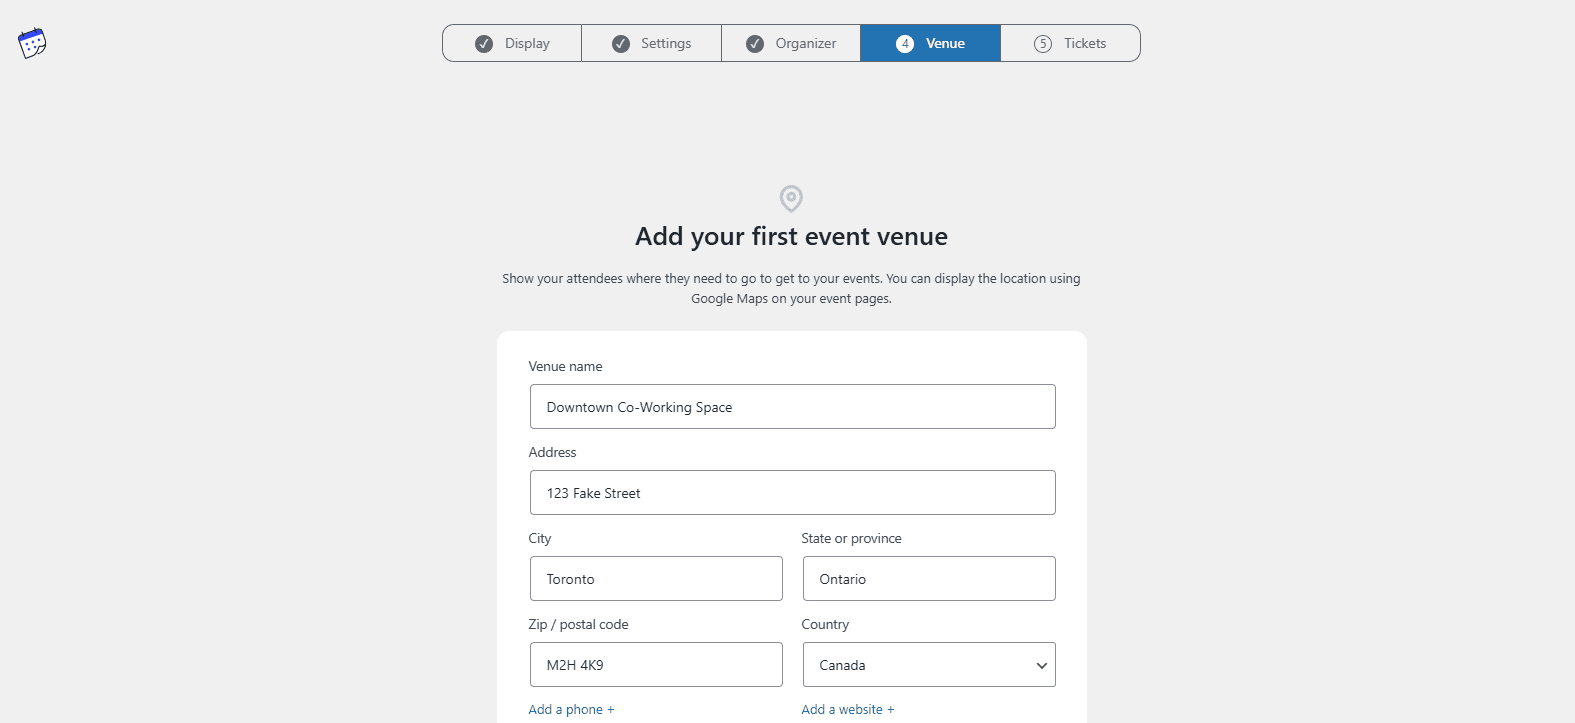
Venue
Add a venue as well, even if it’s pretend or temporary.
Tickets
Hit Continue to answer yes, that you’ll be selling tickets or asking for RSVPs.

Events Pages
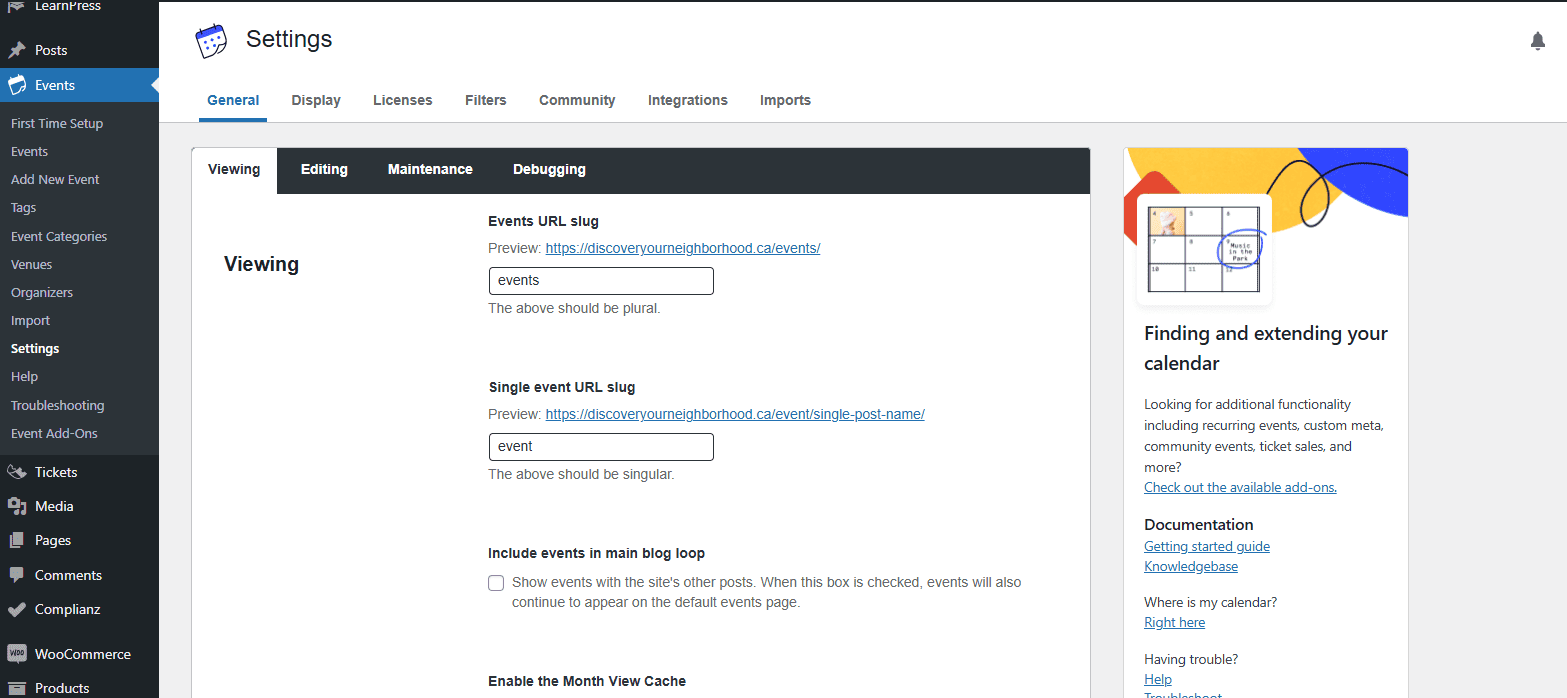
After you finish the setup, go to Events > Settings.
Here, you can see the page that was automatically created by the plugin which will populate all the events (mydomain.com/events) and the format of the URLs for the single event pages.
Tickets
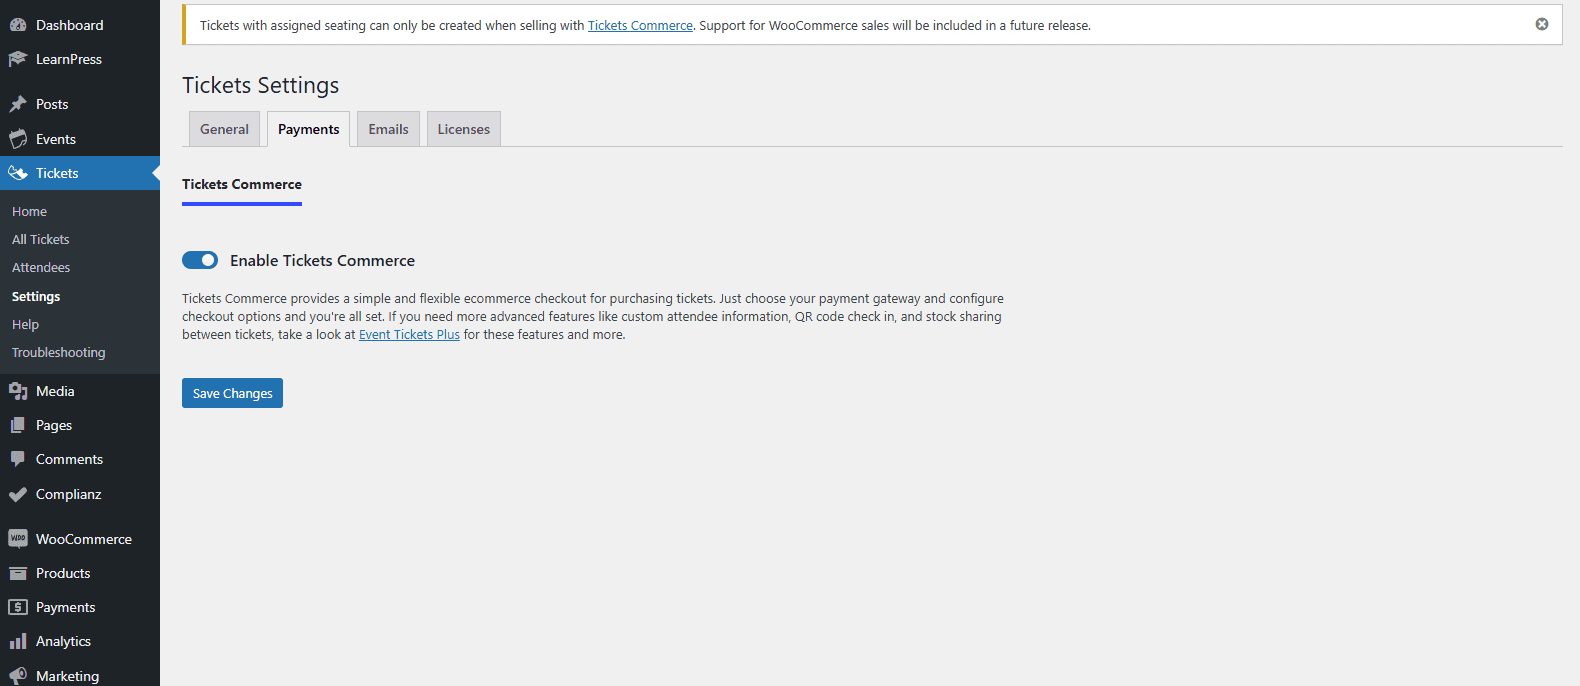
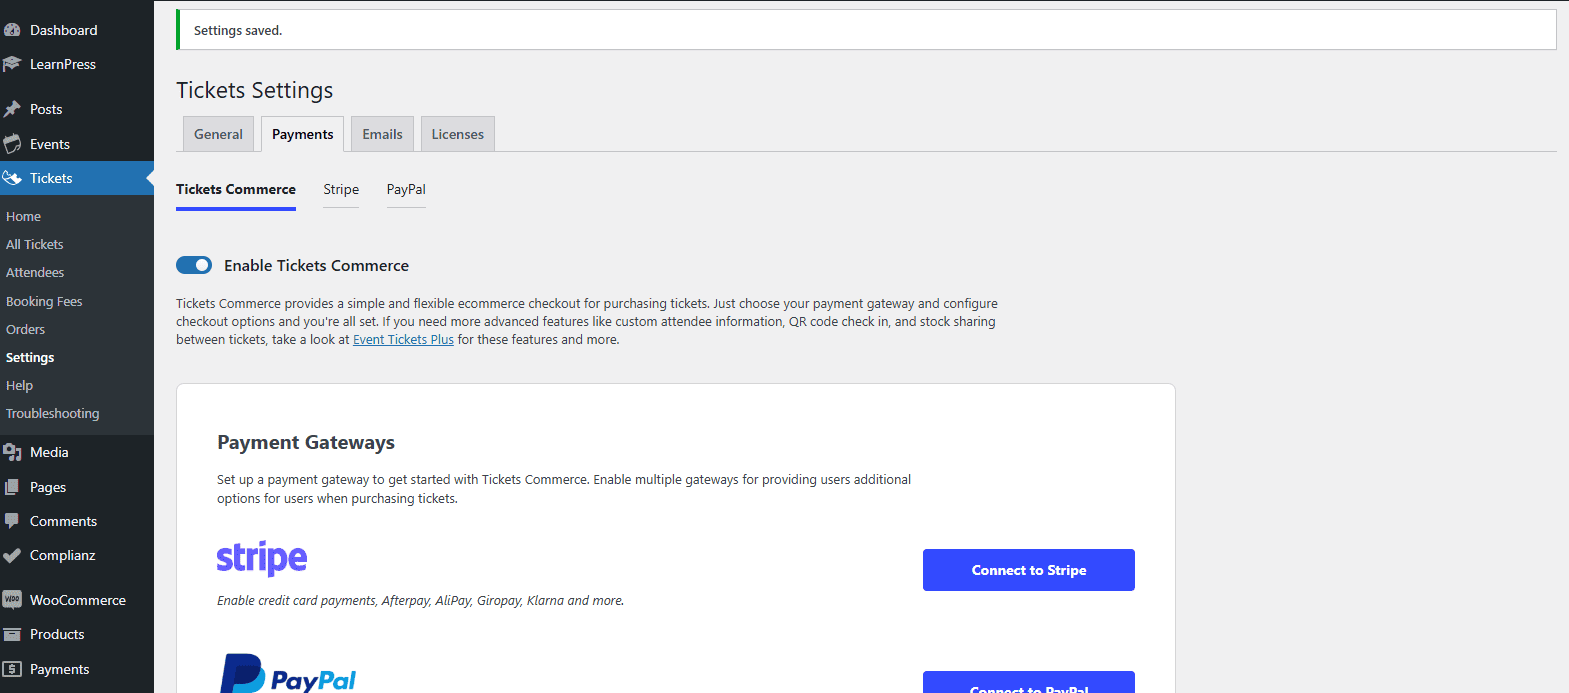
But before we take a look at the frontend, go to Tickets > Home > Configure Settings so you can add tickets to your events.

Ticket Settings
Hitting Configure Settings should take to Tickets > Settings, and the most important one is Payments, where you should toggle on Tickets Commerce.
Stripe & PayPal
Once you do, you should see the options to connect with Stripe or PayPal below.
Editing Events
Now, let’s create our first event.
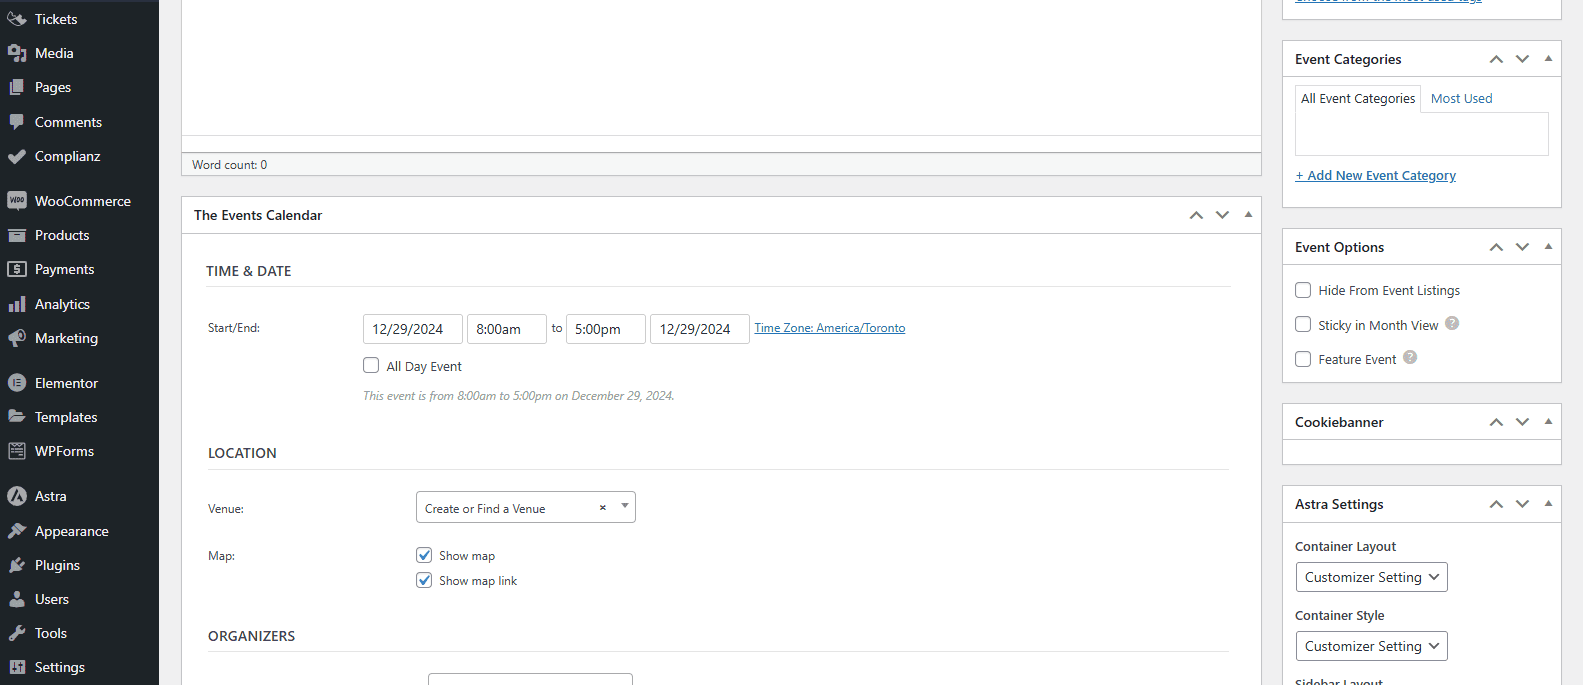
In the dashboard, go to Events > Add New Event.
You’ll see all kinds of options and settings. You can add a title up top; description just below; time, date and location next; organizer, venue, tickets and/or RSVPs; and on the righthand side, you can create categories and change the Astra settings for that single event page.
For Organizer and Venue, choose the ones you created in the setup to make the whole process faster.
At the very bottom, you want to disable comments because you don’t want visitors to leave comments on your event like a blog post.
Go to the Frontend
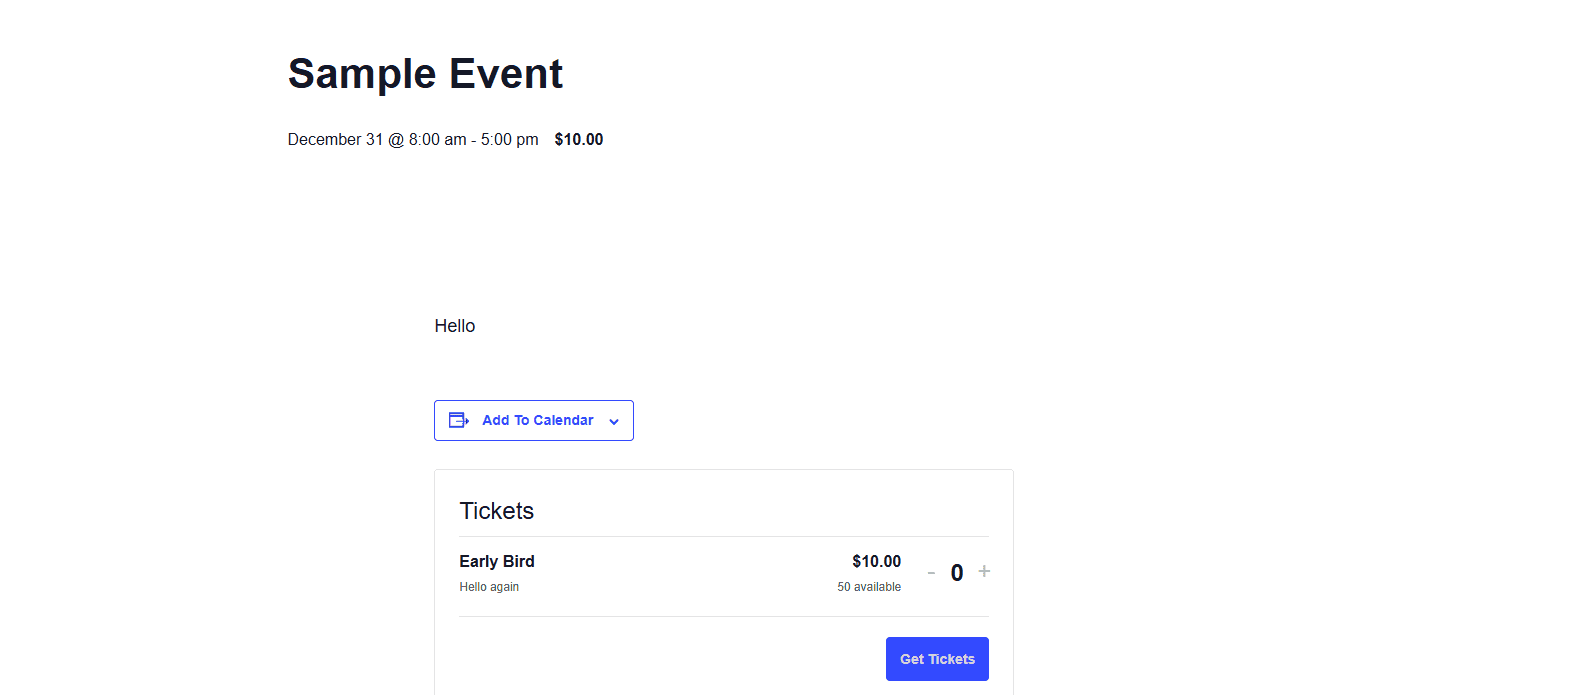
After you hit Publish at the top, click on View Event or the URL below the title to see what it looks like on the frontend.
If you scroll down, you’ll see the event details like the address, venue, organizer, and the Google map.
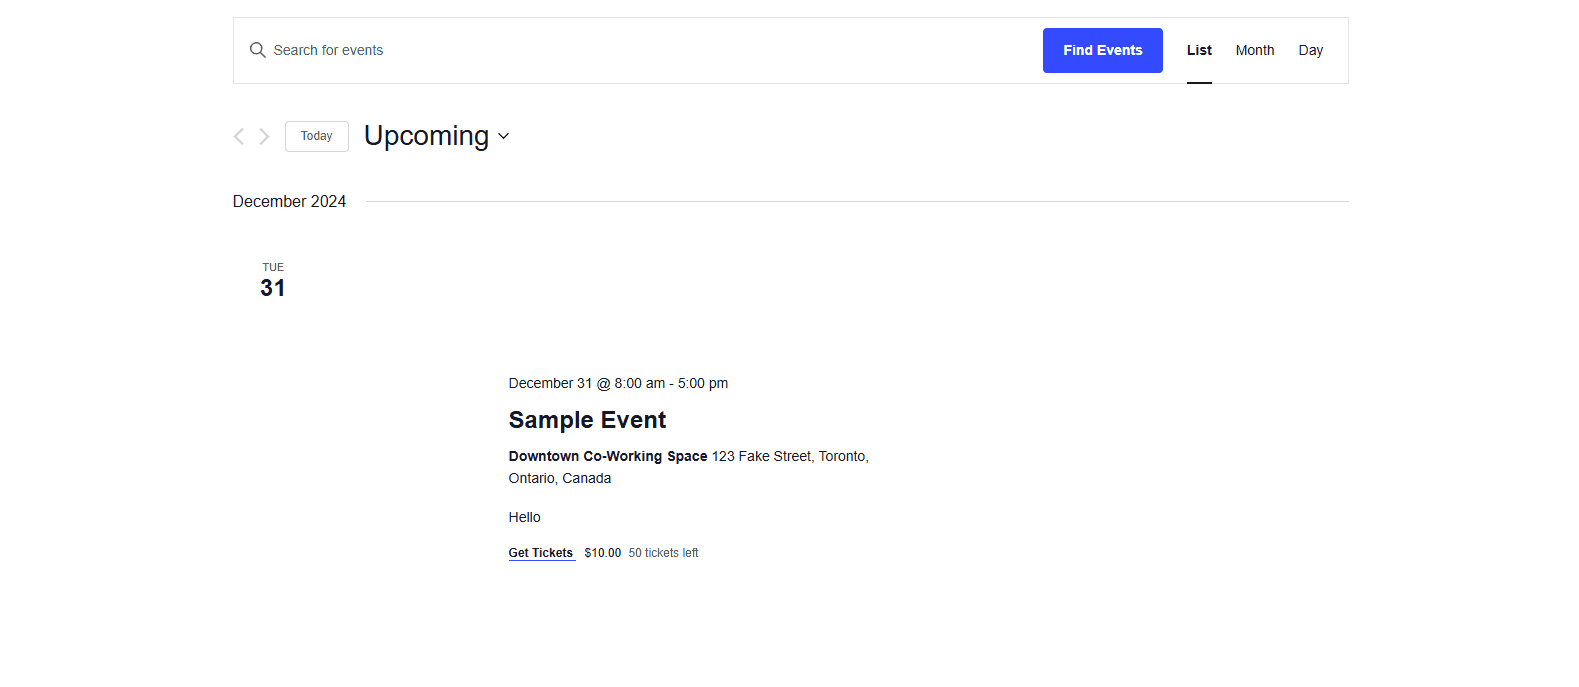
Check Out The Events Page
If you go to mydomain.com/events, you should see the archive page that lists all the events you’ve created and published.
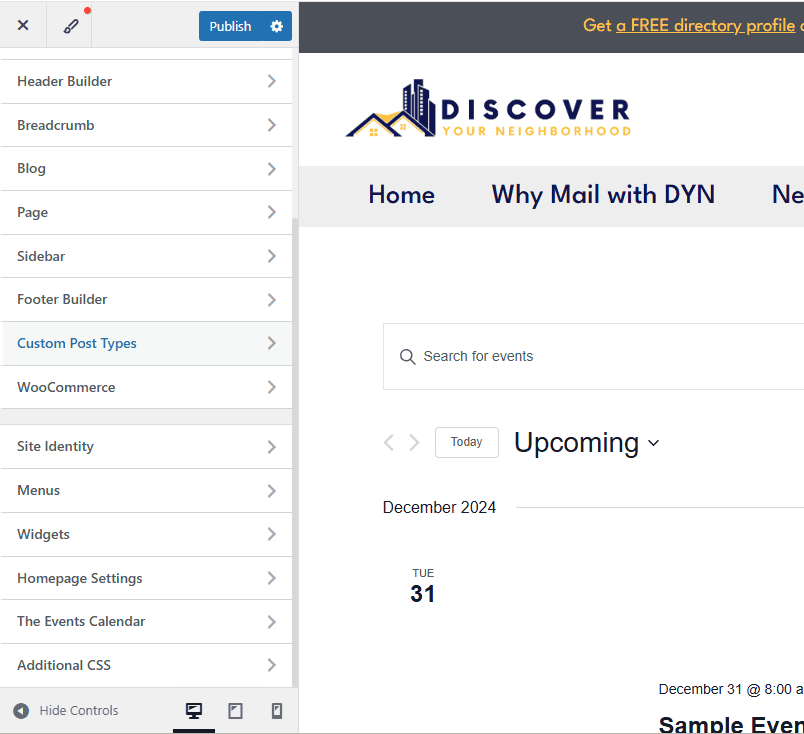
Customization
When it comes to customizing the archive event and single events pages, there are some options in Appearance > Customize > Custom Post Types.
You’ll also see more under Customize > The Events Calendar.
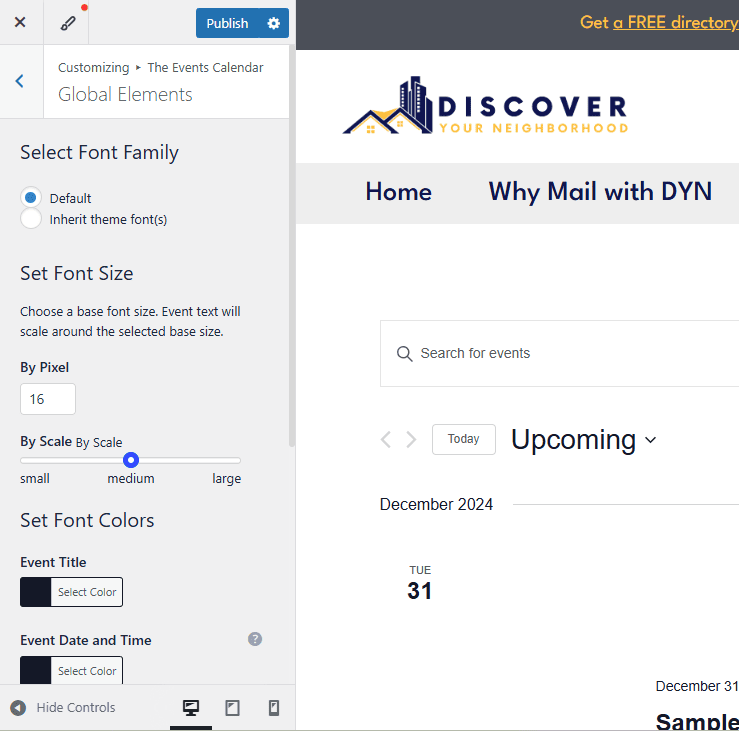
Global Elements
For example, under Global Elements, you can change the font, colors and so on.
Notice the option to Inherit theme font(s) under Select Font Family, which should make The Events Calendar use the typography you selected in Astra.
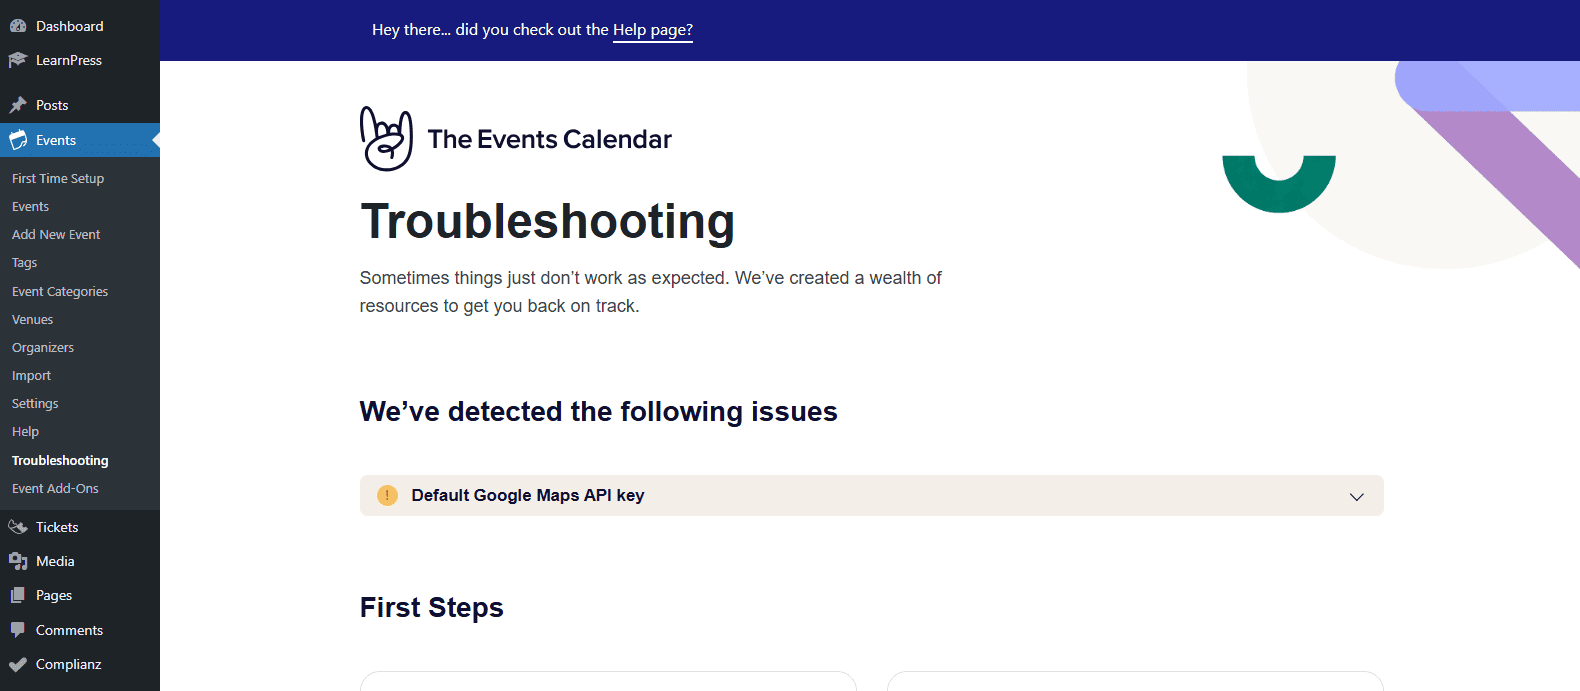
Help Articles
If you ever have trouble, you can go to Events > Troubleshooting to read answers to the FAQs or common issues users face, and any of the links will take you to TEC’s very comprehensive knowledgebase.
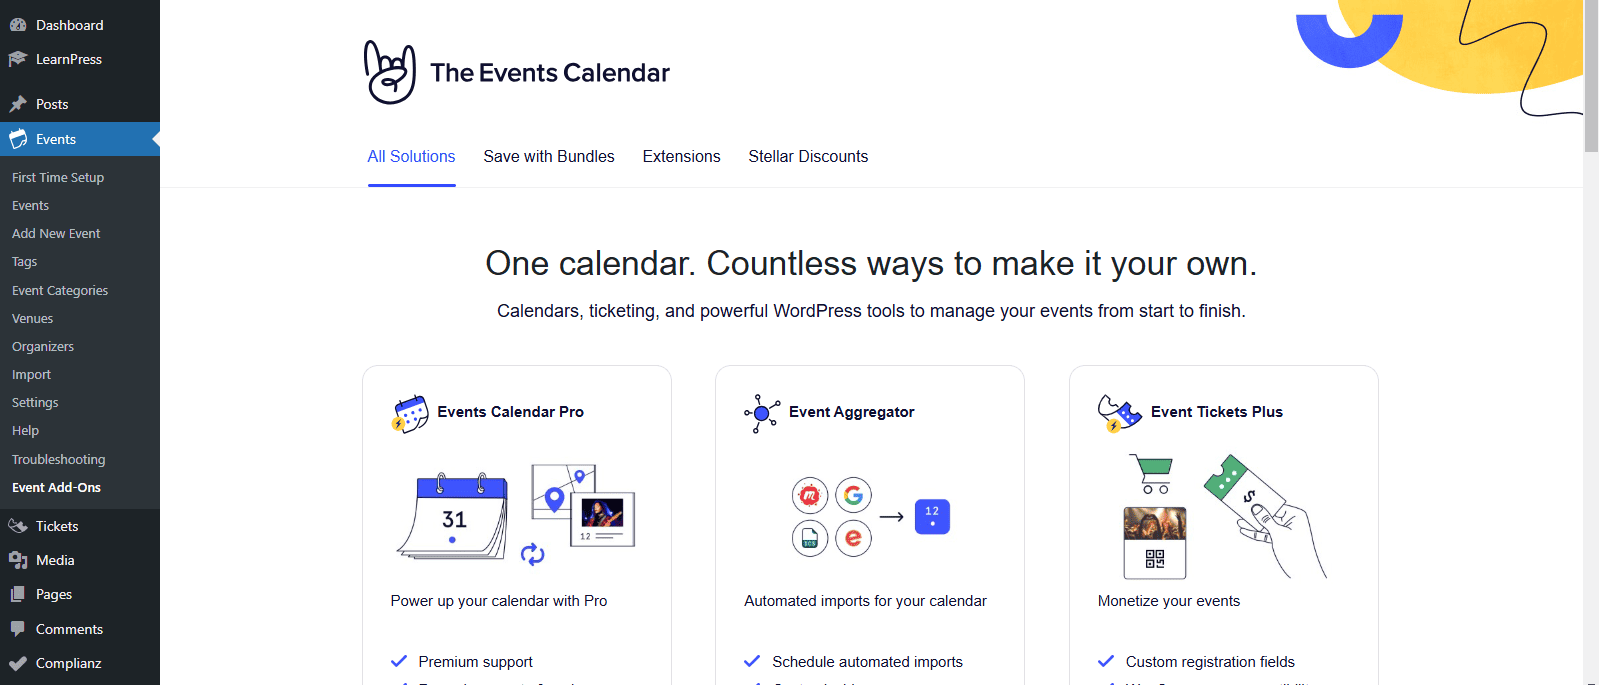
Want to Do More?
The Events Calendar has a few free and lots of premium add-ons to allow you to do much more. You can check them out under Events > Event Add-Ons.
Next Steps
Clearly, there can be a lot more to do with TEC, especially if you use any of the add-ons.
Here’s their knowledgebase to keep learning on your own and here’s the WordPress.org forum for The Events Calendar’s core plugin where you can ask questions
But feel free to ask me any questions on the calls.